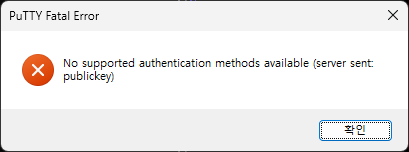
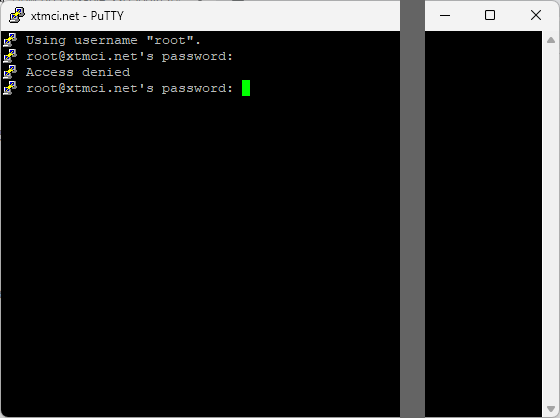
Categories
SSH

How to Specify a Private Key on PuTTY Command Line

-i Option

The PuTTY -i option allows you to specify a private key file.

A private key file is in *.PPK format. PuTTY will use this file to authenticate with the server.
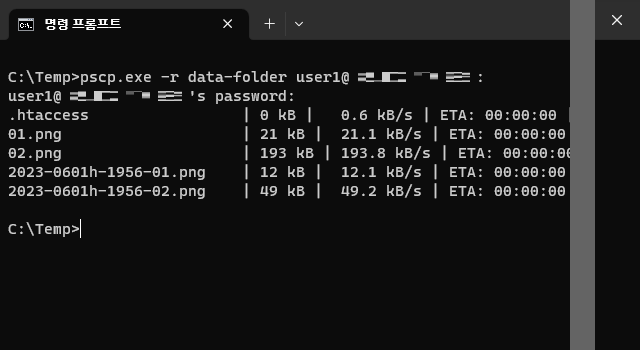
The Command Line

Use the -i option to specify a private key.

C:\> putty.exe -i privatekey.ppk username@servername.com

You can use the option with a pscp.exe command for the same purpose.

C:\> pscp.exe -i privatekey.ppk filename.txt username@servername.com:path

Categories
SSH

패스워드 (Password) 방식에 의한 SSH 로그인 금지하기

1. 작업 전 주의 사항

이후의 작업은 SSH 키 인증 방식으로 로그인한 상태에서 진행해야 한다.

2. sshd_config 파일 편집

“/etc/ssh/sshd_config” 파일을 연다.

sudo vi /etc/ssh/sshd_config

파일에서 아래 라인을 찾는다.

PasswordAuthentication yes

“yes” 부분을 “no” 로 바꾼다.

PasswordAuthentication no

파일을 저장하고 편집기를 닫는다.

3. SSH 서버 재시작

아래 명령으로 SSH 서버를 재시작한다.

sudo systemctl restart ssh

4. 결과 확인

암호 로그인 방식으로 SSH 연결을 시도해 본다.

C:\>putty username@servername.com

연결에 실패하는 것을 확인한다.

Categories
SSH

윈도우에서 PuTTY pscp.exe 명령으로 폴더 (디렉토리) 전송하기

1. -r 옵션

pscp.exe 명령의 -r 옵션을 사용한다.

pscp.exe -r data-folder user1@192.168.0.7:

여기서 “data-folder” 는 전송할 폴더의 이름이다.

2. 결과 확인

우분투 호스트에서 전송된 폴더와 파일을 확인한다.

ls -l

ls -al data-folder/

Categories
SSH

루트 (root) 계정의 SSH 서버 로그인 금지하기

1. SSH 서버 설정 파일 편집

편집기로 /etc/ssh/sshd_config 파일을 연다.

sudo vi /etc/ssh/sshd_config

파일에서 다음 라인을 찾는다.

PermitRootLogin yes

이 라인에서 “yes” 를 “no” 로 변경한다.

PermitRootLogin no

파일을 저장하고 편집기를 닫는다.

2. SSH 서버 재시작

SSH 서버를 재시작한다.

sudo systemctl restart ssh

3. 결과 확인

루트 (root) 계정으로 SSH 서버에 접속해 본다.

접속 거부를 의미하는 “Access denied” 메시지가 출력되는 것을 확인한다.